使用VITE+REACT创建项目
温馨提醒
本教程对没有接触过前端开发的同学不友好
温馨提醒1
我们已经推出适用于≥1.3.3主程序的图片模板开发包 点击查看
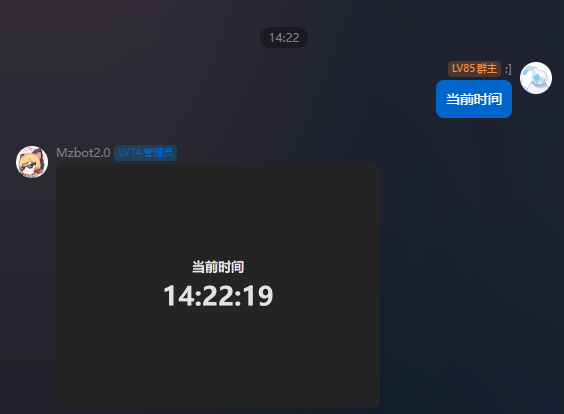
本教程,我们要实现一个获取时间的卡片

安装NodeJS
设置国内源
由于懂的都懂
bash
npm config set registry https://registry.npmmirror.com/创建项目
bash
npm create vite@latest- 在交互式模式中输入项目名字
- 在
Select a framework时选择React - 在
Select a variant时选择适合你的语言,本教程使用TypeScript
bash
npm create vite@latest
Need to install the following packages:
create-vite@6.1.1
Ok to proceed? (y) y
√ Project name: ... vite-project
√ Select a framework: » React
√ Select a variant: » TypeScript

Scaffolding project in D:\Codes\Nodejs\vite-project...

Done. Now run:

  cd vite-project
  npm install
npm run dev进入你的项目目录,使用npm install安装所有依赖
使用相对路径
在你的模板被加载好后,EasyBot会代理路径,如果使用默认的/作为路径,Vite将会访问EasyBot项目的路径,因此 你需要将vite.config.ts中的base改为./
ts
import { defineConfig } from 'vite'
import react from '@vitejs/plugin-react'

export default defineConfig({
  base: './', // 添加这一行
  plugins: [react()],
})
安装SDK
使用以下命令安装SDK
bash
npm install easybot-image-sdk创建申明文件
如果你成功完成了上面的操作,你的目录结构应该是这样的
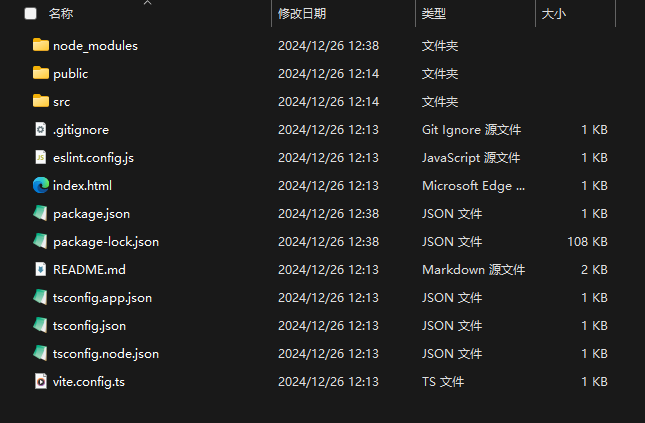
我们现在需要创建一个声明文件,打开public 并在目录下创建一个manifest.json文件,并写入以下内容
json
{
    "name": "我的第一个模板",
    "description": "这是我的第一个模板",
    "id": "my_first_template",
    "author": [
        "Me"
    ],
    "version": "1.0.0",
    "icon": "/assets/icon.png",
    "dependencies": [],
    "tag": [
        "信息"
    ],
    "settings": {
        "allow": false
    },
    "template": [
        {
            "key": "time",
            "name": "当前时间",
            "path": "index.html",
            "settings": {
                "allow": false
            },
            "no_server": true
        }
    ]
}
编写逻辑
根据manifest.json中的配置,我们要实现一个时间的卡片
App.tsx
tsx
import './App.css'
function App() {
  return (
    <div className='container'>
      <div className='clock'>
        <p className='title'>当前时间</p>
        <p className='time'>{new Date().toLocaleString(undefined, {
          hour: '2-digit',
          minute: '2-digit',
          second: '2-digit',
        } as Intl.DateTimeFormatOptions)}</p>
      </div>
    </div>
  )
}

export default App
App.css
css
.container {
  height: 100vh;
  width: 100vw;

  display: flex;
  flex-direction: column;
  justify-content: center;
  align-items: center;
}

.time {
  font-size: 4rem;
  font-weight: bold;
  margin: 0;
}

.title {
  text-align: center;
  font-size: 2rem;
  margin: 0;
  font-weight: bold;
}
打包
运行npm run build进行打包
bash
npm run build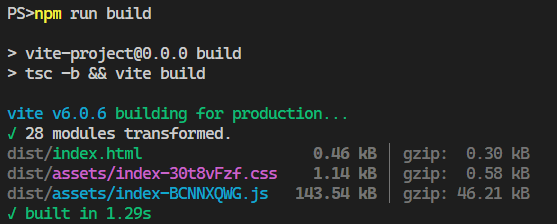
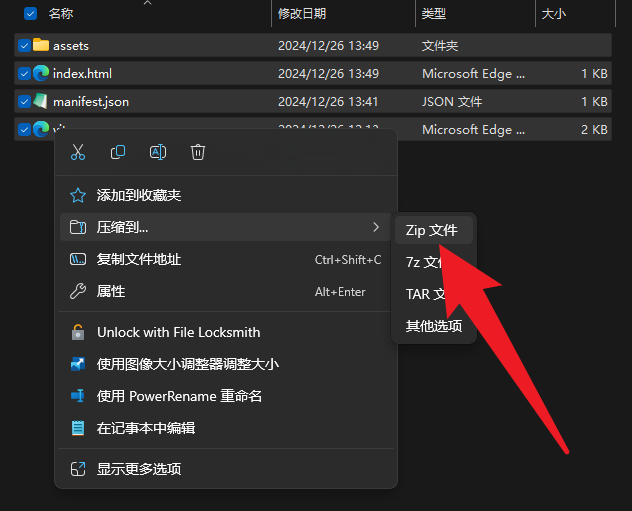
打包的结果在dist目录下,你需要进入目录,全选文件,然后右键压缩成zip文件
在EasyBot加载本模板
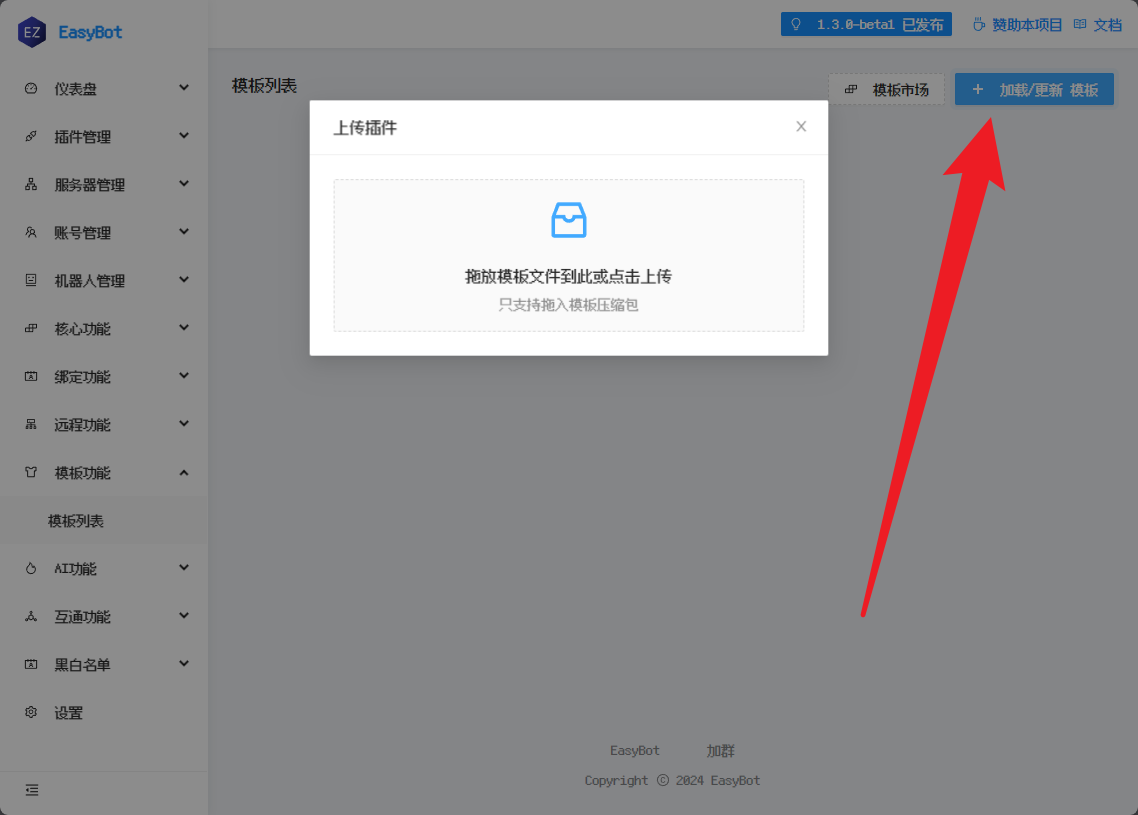
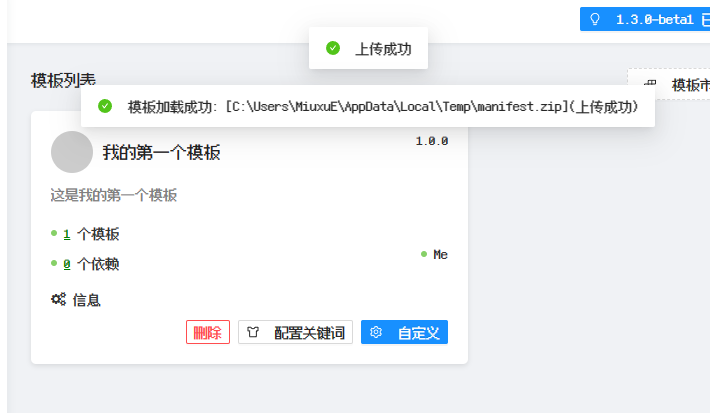
确认一切无误后,打开EasyBot的模板管理页面,将打包好的zip文件上传即可
配置关键词
关键词是EasyBot识别模板的关键,你可以在模板管理页面中配置关键词,当用户在群聊内发送对应消息时,模板会触发 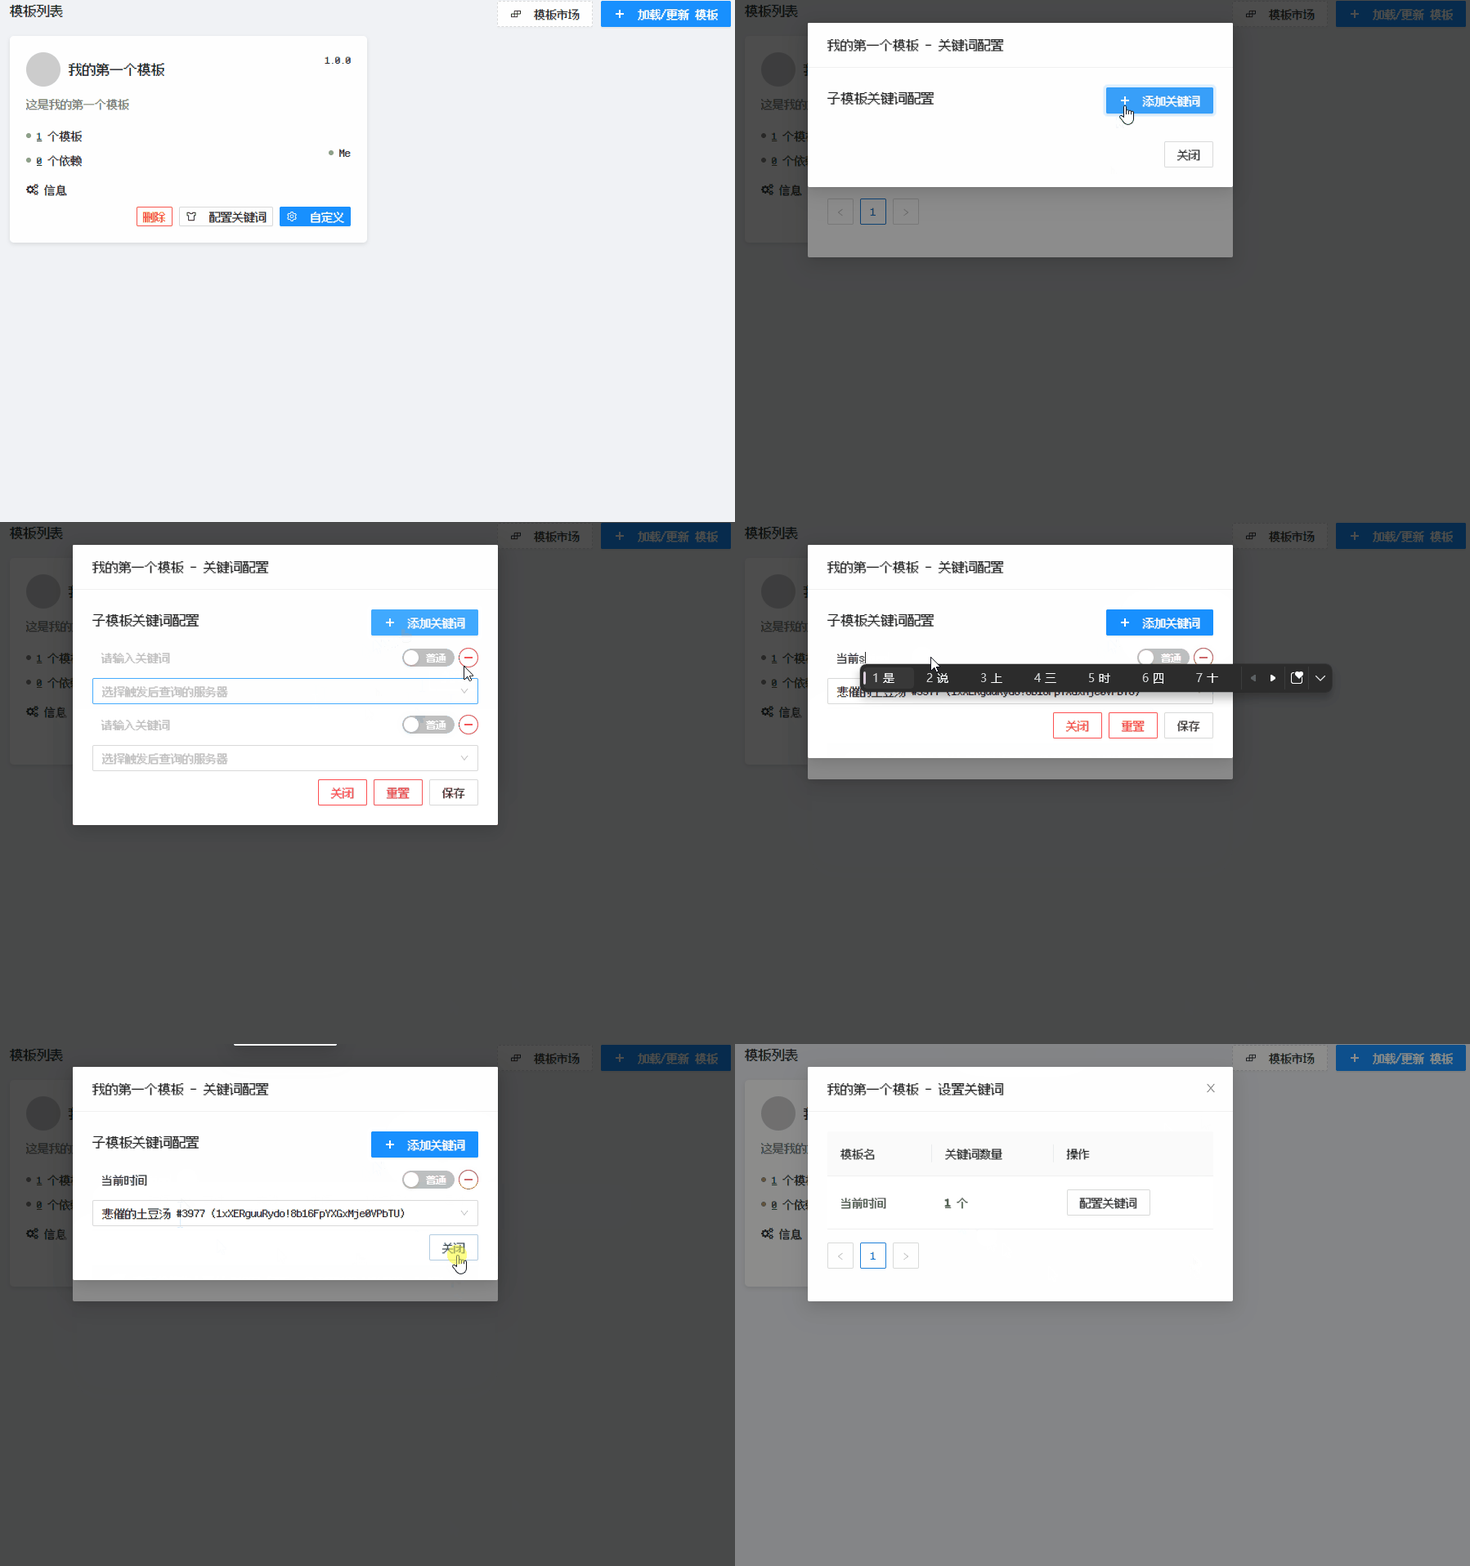
测试
